Visualize graphs in Ladybug Explorer
What is Ladybug Explorer?
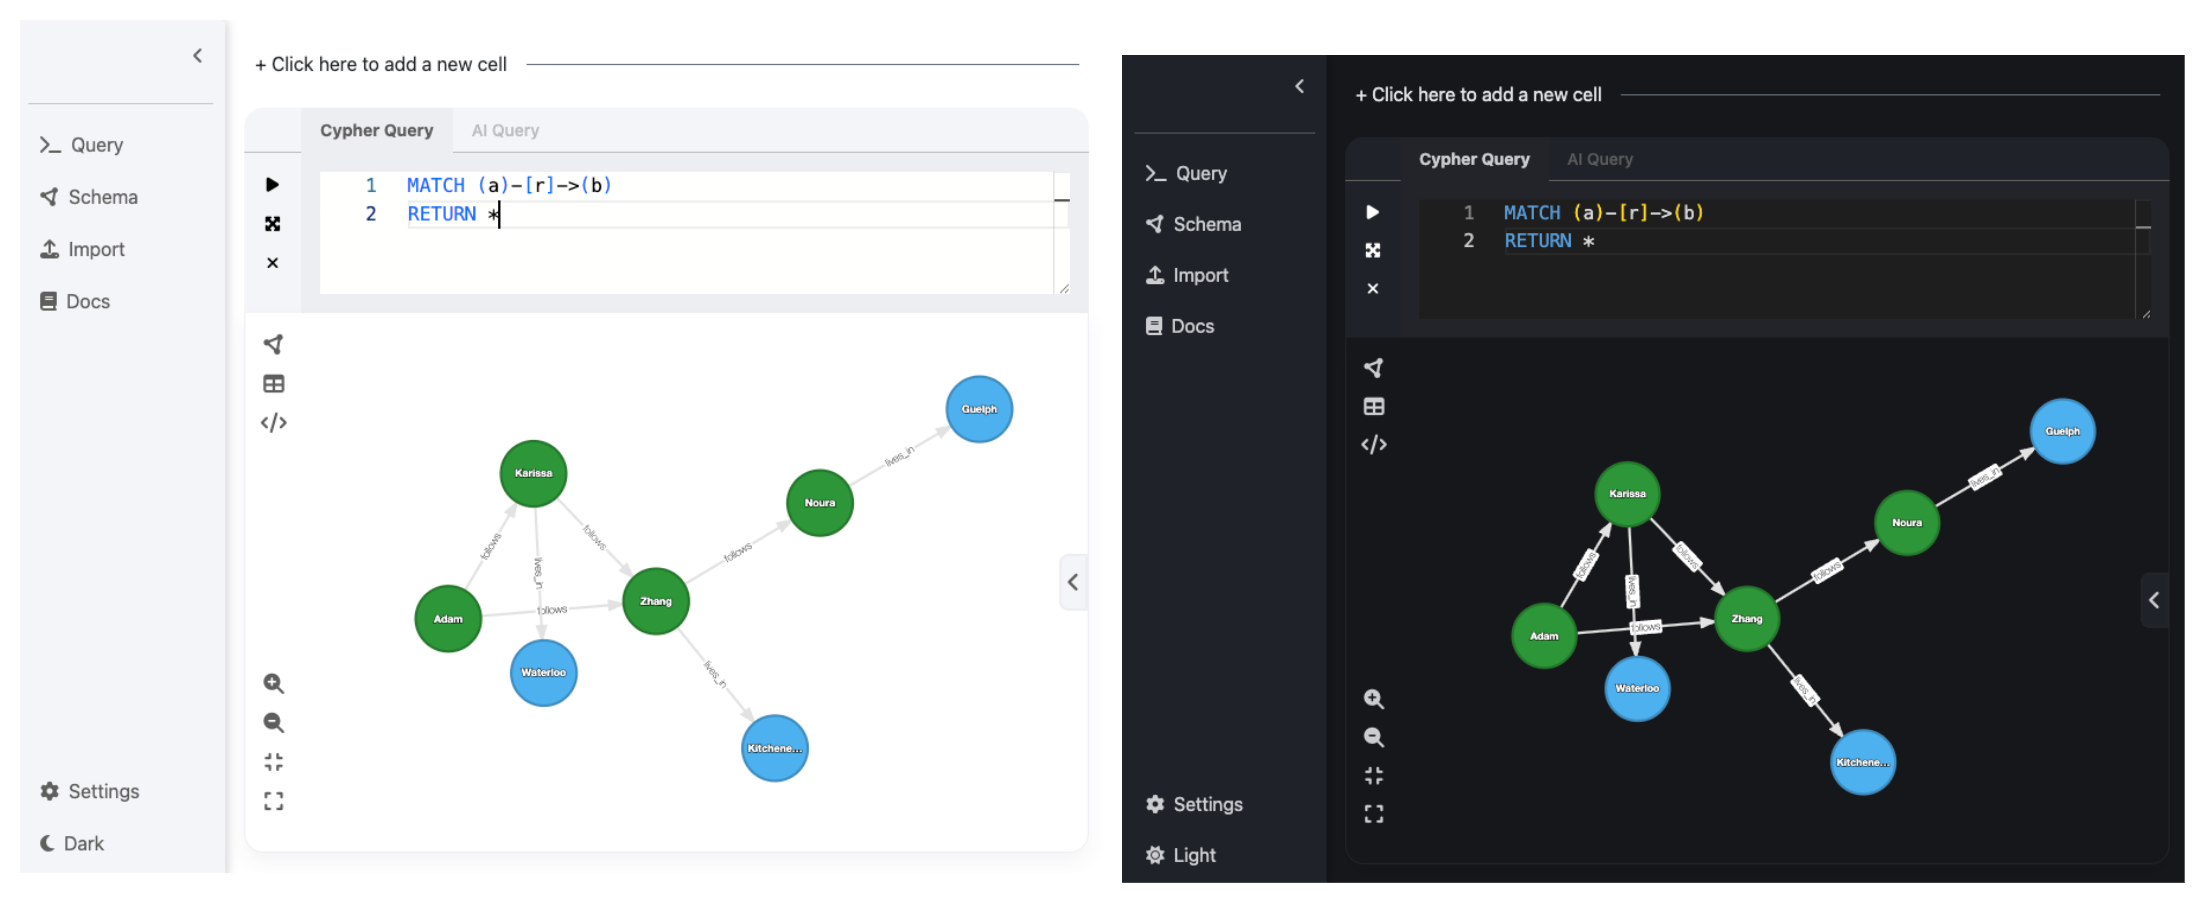
Ladybug Explorer is a browser-based frontend to visualize and explore Ladybug database schemas and query results in the form of a graph, table, or JSON. This is a useful tool for exploring your graph data and debugging your data model during the prototyping phase. An example visualization (in light mode and dark mode) is shown below.
Launching Ladybug Explorer
Ladybug Explorer is a web application that is launched from a deployed Docker image. Please refer to the Docker documentation for details on how to install and use Docker.
Below we show two different ways to launch Ladybug Explorer. Each of these options make Ladybug Explorer accessible on http://localhost:8000. If the launching is successful, you should see the logs similar to the following in your shell:
Access mode: READ_WRITEVersion of Ladybug: v0.0.11Deployed server started on port: 8000Option 1: Using an existing database
To access an existing Ladybug database, you can mount its path to the /database directory as follows:
docker run -p 8000:8000 \ -v {path to the directory containing the database file}:/database \ -e LBUG_FILE={database file name} \ --rm ghcr.io/ladybugdb/explorer:latestBy mounting a local database file in Docker via -v {path to the directory containing the database file} and -e LBUG_FILE={database file name}, the changes done in the UI will persist to the local database file after the UI is shutdown. If the directory is mounted but the LBUG_FILE environment variable is not set, Ladybug Explorer will look for a file named database.kz in the mounted directory or create it if missing.
The --rm flag tells docker that the container should automatically be removed after we close docker.
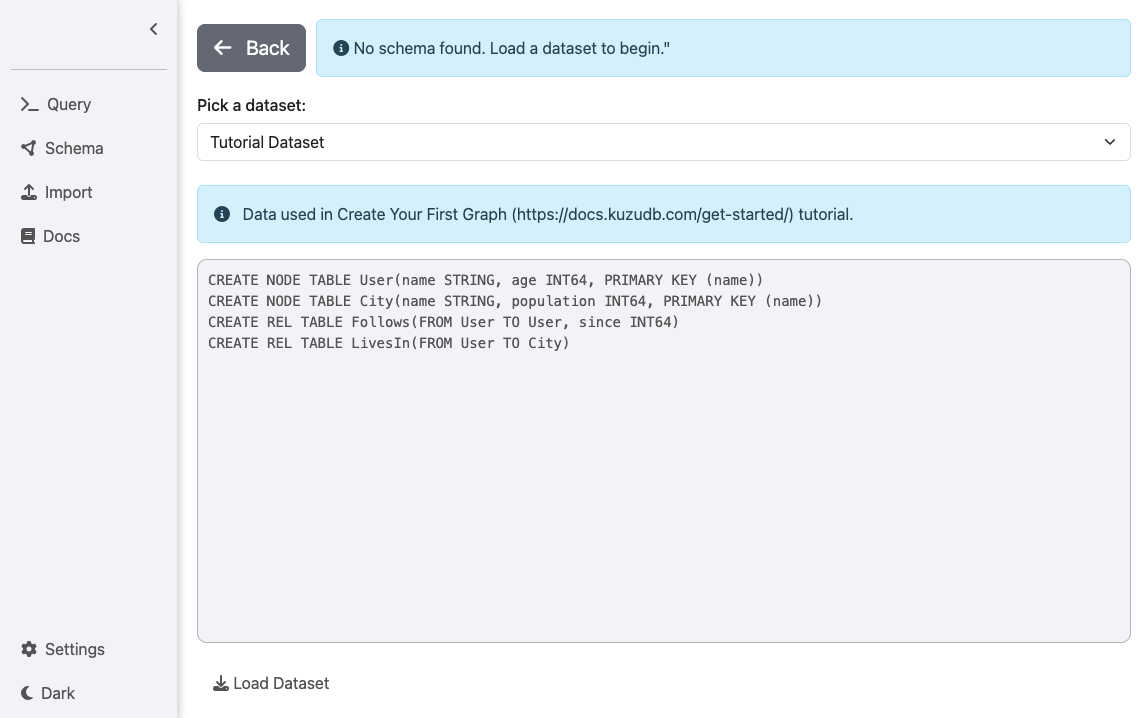
Option 2: Start with an empty database with example data
You can also launch Ladybug Explorer without specifying an existing database. Ladybug Explorer comes with
bundled datasets that you can use to explore the basic functionalities of Ladybug.
This is simply done by removing the -v flag in the example above. If no database path is specified
with -v, the server will be started with an empty database.
docker run -p 8000:8000 --rm ghcr.io/ladybugdb/explorer:latestClick on the Datasets tab on the top right corner and then: (i) you can select one of the bundled datasets
of your choice from the drop-down menu; (ii) load it into Ladybug by clicking the “Load Dataset” button; and (iii)
finally use Ladybug Explorer to explore it.
Additional launch configurations
Access mode
By default, Ladybug Explorer is launched in READ_WRITE mode, which means that you can modify the database.
If you want to launch Ladybug Explorer in read-only mode, you can do so by setting the MODE
environment variable to READ_ONLY as shown below.
docker run -p 8000:8000 \ -v /absolute/path/to/database:/database \ -e MODE=READ_ONLY \ --rm ghcr.io/ladybugdb/explorer:latestIn read-only mode, you can still issue read queries (such as MATCH) and visualize the results,
but you cannot run queries that require write access (such as MERGE, CREATE, or SET), or modify the
database schema.
In-memory mode
By default, Ladybug Explorer is launched under on-disk mode, in which the database exists on disk.
If you want to launch Ladybug Explorer to operate on an in-memory database,
you can do so by setting the LBUG_IN_MEMORY environment variable to true as follows.
docker run -p 8000:8000 \ -e LBUG_IN_MEMORY=true \ --rm ghcr.io/ladybugdb/explorer:latestYou can think of an in-memory database as ephemeral, where the database exists purely in memory —
all changes are lost when the Docker container is stopped, so mounting a database
with -v does nothing in this case.
Buffer pool size
By default, Ladybug Explorer is launched with a maximum buffer pool size of 80% of the available memory. If you want to launch Ladybug Explorer with a different buffer pool size, you can do so by setting the LBUG_BUFFER_POOL_SIZE environment variable to the desired value in bytes as follows.
For example, to launch Ladybug Explorer with a buffer pool size of 1GB, you can run the following command.
docker run -p 8000:8000 \ -v /absolute/path/to/database:/database \ -e LBUG_BUFFER_POOL_SIZE=1073741824 \ --rm ghcr.io/ladybugdb/explorer:latestAccessing data files in the container
As mentioned above, Ladybug Explorer is launched from a Docker image. If you want to access the data files in the container, you can do so by mounting a directory on your host machine as follows:
docker run -p 8000:8000 \ -v /absolute/path/to/database:/database \ -v /absolute/path/to/data:/data \ --rm ghcr.io/ladybugdb/explorer:latestWith this configuration, the data directory you specify on your host machine will be accessible as /data in the container. For example, in the query panel, you can copy a CSV file into your database by running the following command:
COPY Test FROM "test.csv" (HEADER=true);Note that it is possible to mount multiple directories in the container. For more details, refer to the Docker documentation.
Panels
Ladybug Explorer comes with the following panels, accessible on the top-right of the menu bar. You can refer to the corresponding cards below for more details.
Development build of Ladybug Explorer
If you are working with the nightly build of Ladybug to access the bleeding edge features, the stable release of Ladybug Explorer may not be compatible with it due to storage format changes. In this case, you can use the development build of Ladybug Explorer, which we also make available on DockerHub.
To install the dev build, you can attach the dev tag to the docker command as follows:
docker run -p 8000:8000 \ -v /absolute/path/to/database:/database \ --rm ghcr.io/ladybugdb/explorer:devThe dev build of Ladybug Explorer is compatible with the nightly build of Ladybug, but it’s not guaranteed to be stable (and can contain bugs), so the dev build of Ladybug Explorer is recommended for testing purposes only.